Cursing And Re-Cursing: What If We Could Understand Recursion Once For All?
Understanding a powerful technique bit by bit, once for all
I guess recursion is a familiar term. But, understanding it is a bit difficult. It’s just in my opinion because we don’t dive into it the right way.
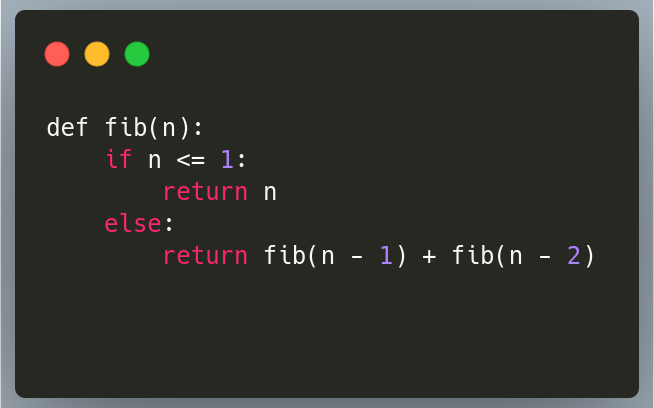
Let’s take a classical recursion snippet, the Fibonacci sequence. It typically yields 0, 1, 1, 2, 3, 5, 8, 13, 21, 34, 55, 89, 144, … And the typical recursive code looks like this.
In this post, we’ll dive into techniques to understand recursion and nurture the ability to develop the gut feeling around it using Koch snowflakes.
Anatomy of recursion
A recursive function has a base case: to stop the function from executing further.
The recursive case enables the function to continue executing.
The recursive case should tend towards the base case. If the base case is low for example 0, we should start with a high number and subtract in the recursive case until we reach the base case.
Output:
Tracking the execution flow
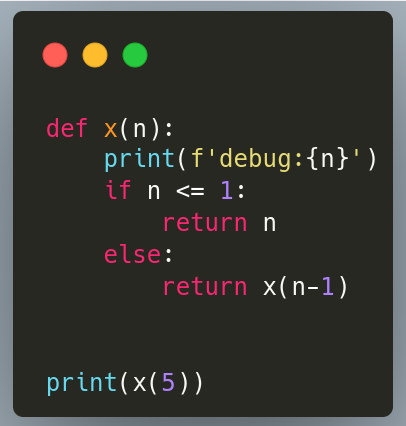
To understand what’s happening code-wise, we’d naturally want to add debug statements.
fib(3) gives us:
It’s very clear that when n is >= 1, we return fib(n-1) + fib(n-2) else we are returning n. If we look carefully we see that we executed the function 5 times. fib(3) returns 2 at the end of the day. It’s a bit confusing to see how it came to this.
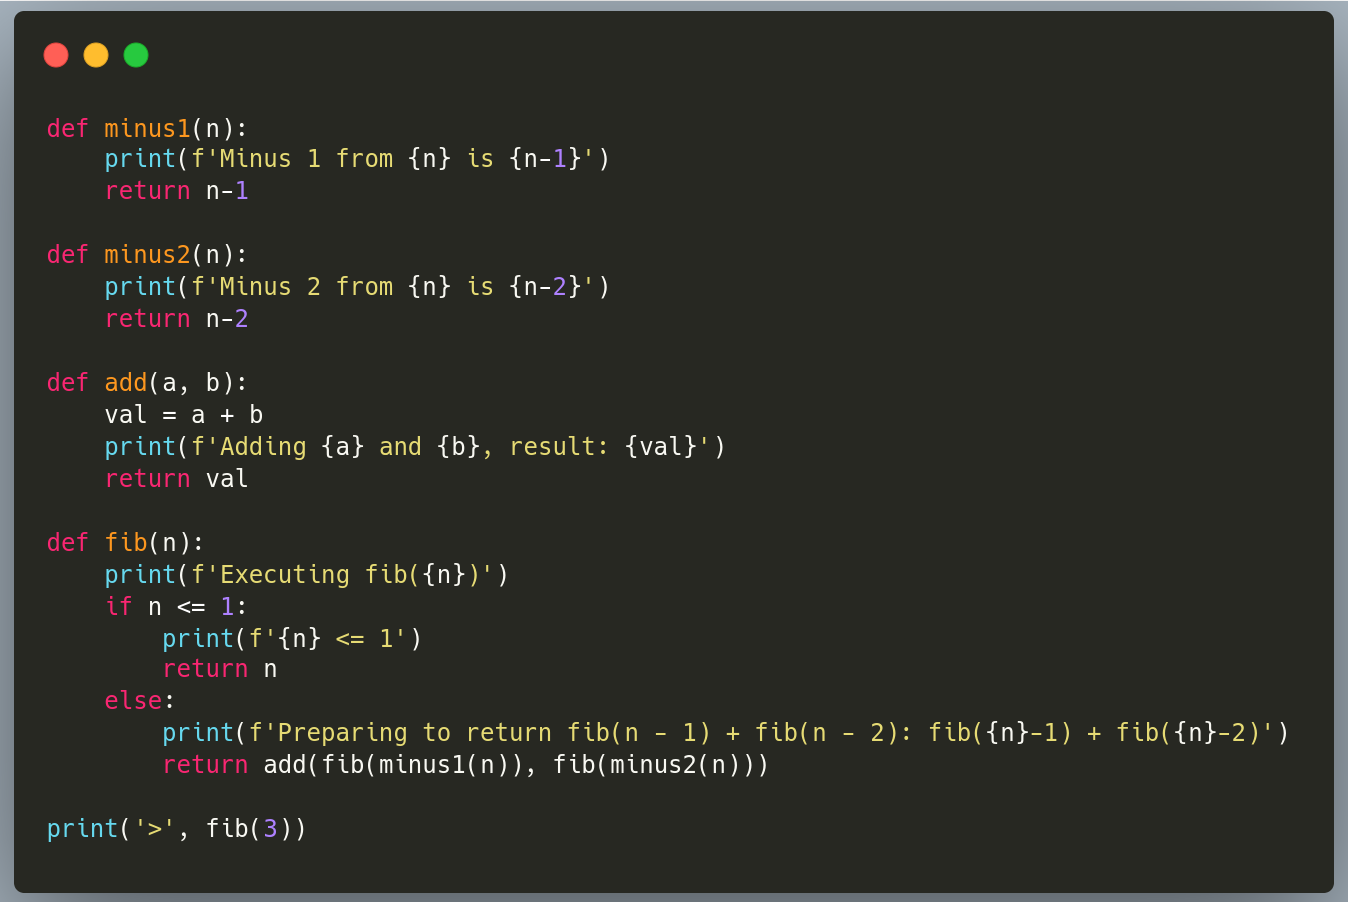
Let’s do the subtraction in a function to get more debug opportunities.
Output
In fact, we can even wrap the addition in a function to get full clarity on what’s going on at every step.
Now we get the full information as to how, at the last line we add 1 and 1, resulting in 2.
Visualizing execution flow
But, we have a problem. We don’t know what function called what other. We need to visualize this. Since we have a terminal we don’t obviously want to start drawing trees around. A simple trick to understand scope is using … indentations.
In our function, we have one entry point and two exits. We indent when an entry point is found and we de-indent when an exit point is found.
In the case where we are returning n, this is simple to understand.
In the case we are returning add(), then add is last evaluated.
So, we de-indent when we reach the last part of add()
Here’s the code
Output
The interpretation of this is as follows: whenever there is a de-indent, it means giving back control to the previous function. Return statements accomplish this.
See that
> Executing fib(3)
and
Adding 1 and 1, result: 2
are at the same level. Compare this visualization with this tool, selecting the Fibonacci template. The implementation above is more comprehensive, capturing addition and subtraction.
Which amounts to this
And, of course, if you take a pen and paper approach, it boils down to this:
I think it’s pretty clear. The code re-runs the function until it hits a base case.
Recursion notes
Sorry to break it to you, but, anything which can be coded by recursion, can also be coded as loops. So, yes, recursion is not special. People tend to like it as a powerful shortcut.
Developing recursion thinking
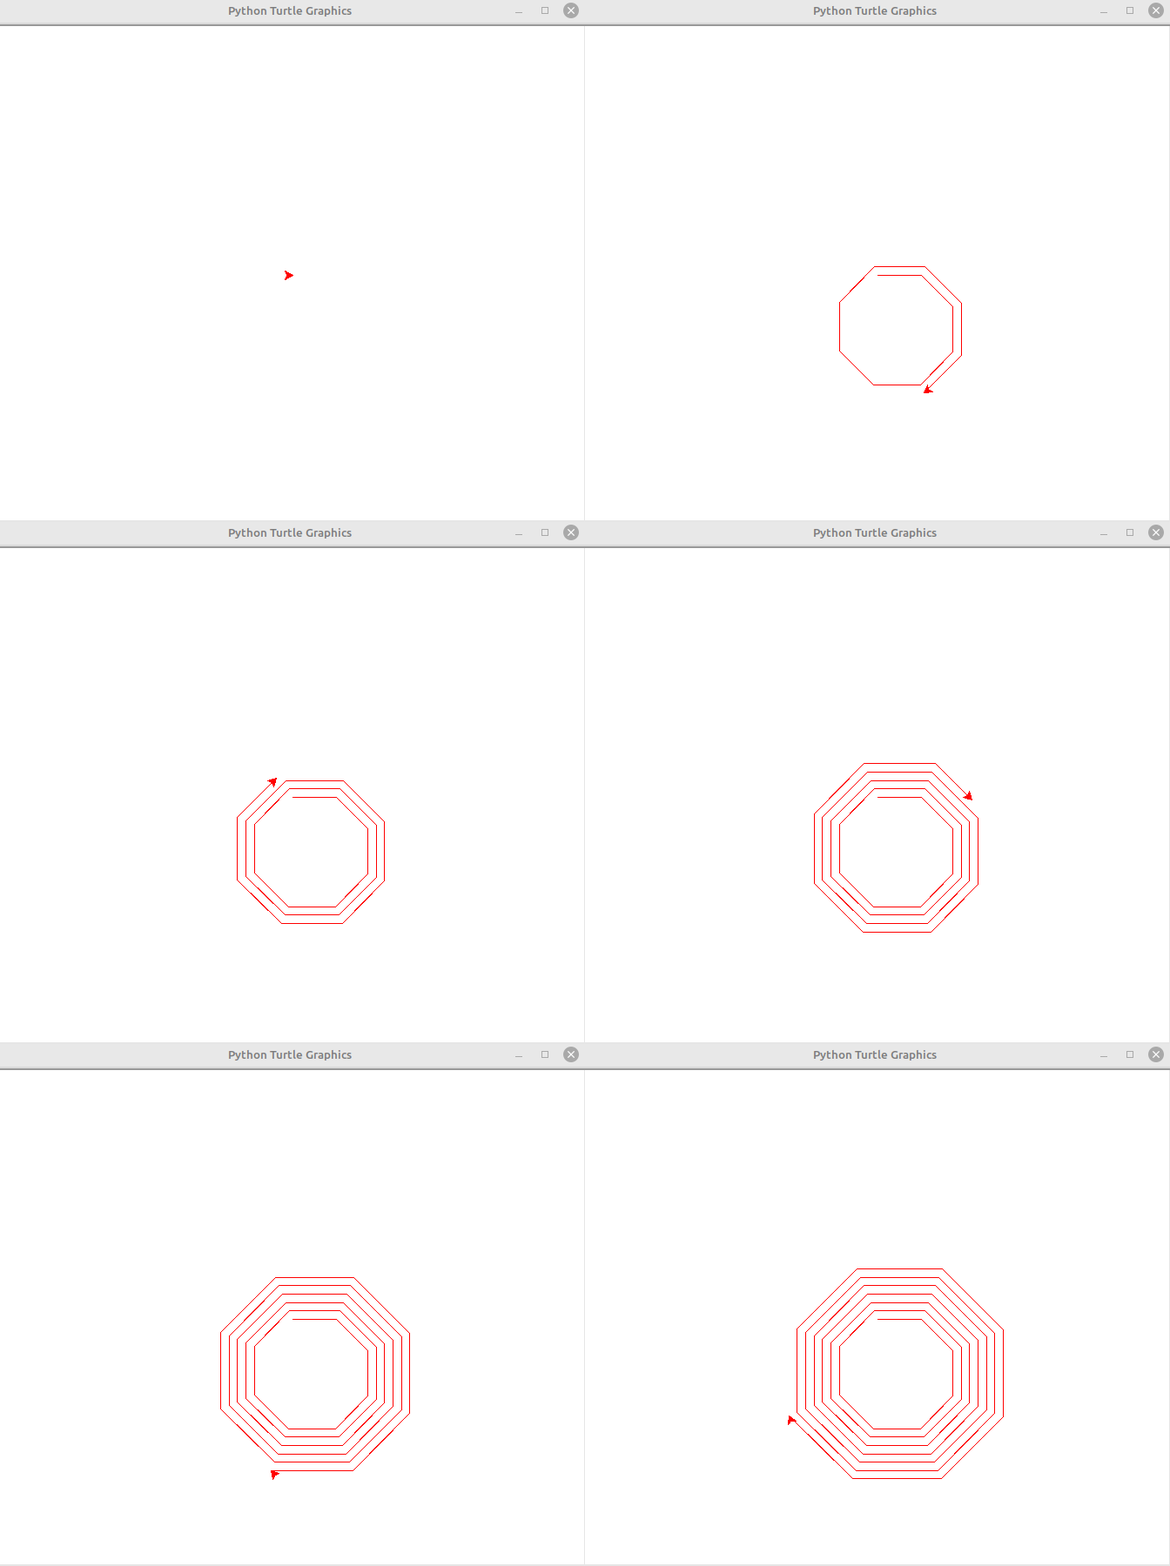
Let us understand recursion by having our function behave like a loop. A print in the body will print 8 .. 1.
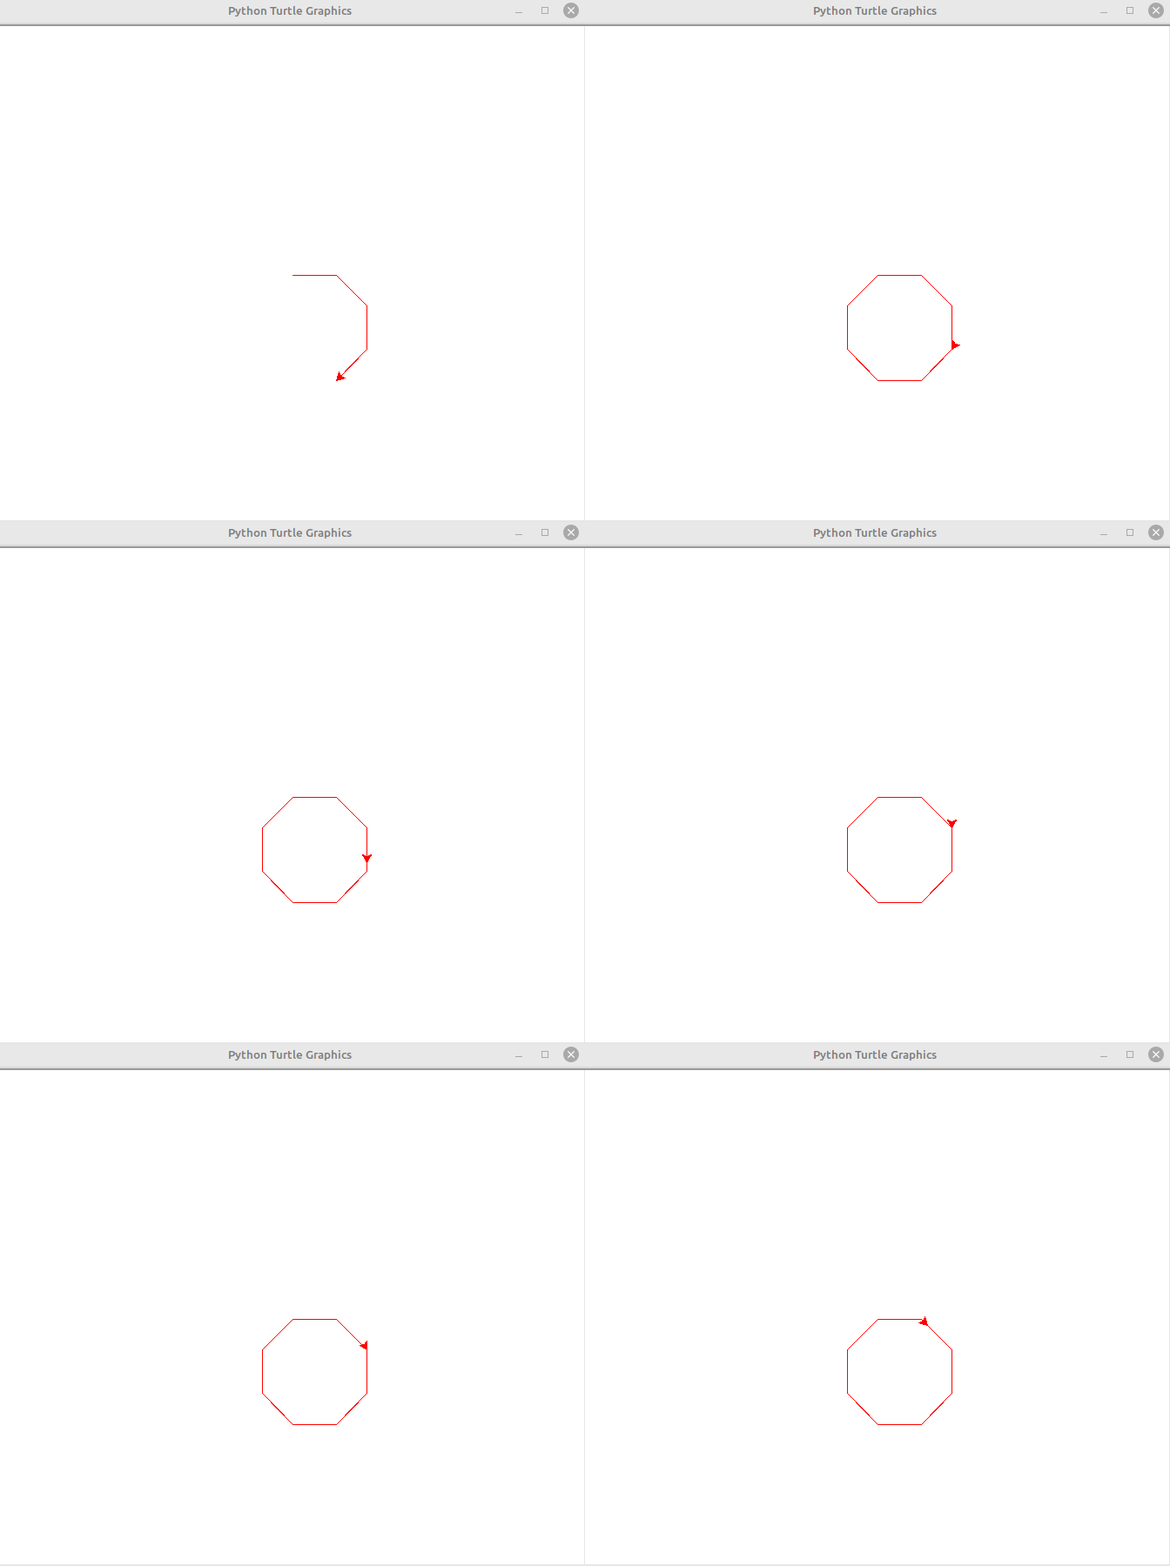
We can loop by calling loop(i=8). We can put whatever we want in the function body and it will be executed. Using the turtle module in Python, let’s draw an octagon.
We just move and turn 45 degrees each time.
We need 16 instructions, i.e. 8 x (move forward , turn right)
If we increase our loop index to let’s say 100, it will redraw along the same path.
But, if we just increase the length by 1, we get a nice spiral.
Congrats, you know how to use recursion to your advantage!
Tackling the Koch snowflake
A Koch snowflake looks like the star of David.
Helge Von Koch in the original paper never drew a snowflake. He just wanted to show a geometric representation of the Weierstrass function. His original working ground starts like this in Sur une courbe continue sans tangente obtenue par une construction géométrique élémentaire:
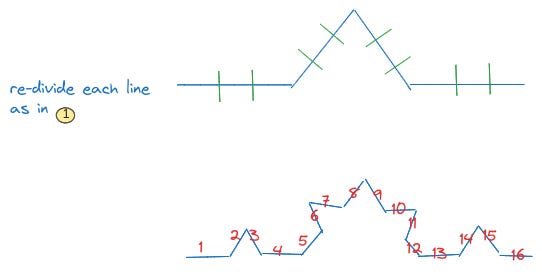
Von Koch says: “1. Let’s connect two points A and B of Fig. 1. Divide AB into 3 equal parts. AC, CE, EB, and construct on CE an equilateral triangle CDE. We will have a broken line ACDEB formed by 4 equal parts. … To sum up, we designate the operation by which we start from a straight segment AB to the polygonal line ACDEB by Ω.”
Von Koch continues: “2. … By the operation Ω Ab is replaced by the broken line ACDEB, the segments AC, CD, DE, EB being equal. Let’s apply operation Ω on each of these segments. The line ACDEB will be replaced by the line AFGHCIKLDMNOEPQRB composed of 16 equal parts, AF, FG, etc.”
Von then continues to say that the next iteration consists of 4^3, i.e. 64 iterations. This is sufficient to understand how this operation functions. Now let’s focus on the angles.
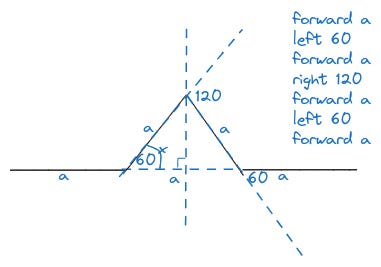
Since the middle is an equilateral triangle, x is 60.
It is also important to note that a is 1/3 of length.
Let’s write a simple function to draw the above:
Very simple, indeed!
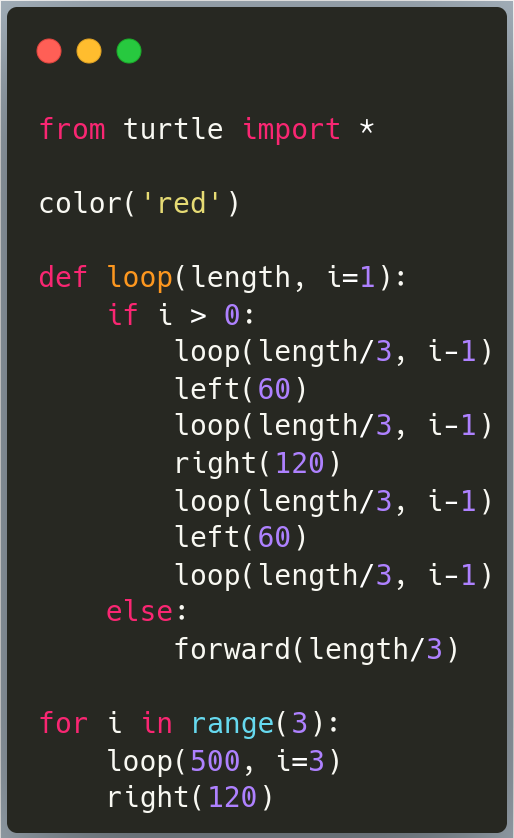
Now, let’s add a base case, but not use any recursion. It draws the same as above.
Now, if we remember what Von Hoch said: “Let’s apply operation Ω on each of these segments”, that’s what we’ll do. We draw the segments by forward(), we just replace forward with our recursive function. If we run the above function, it runs the same image.
But, if we just change our loop index to 3, we see it’s working!!!!
loop(500, i=3)
Now, if we want to draw a flake, we’ll notice that it consists of 3 curves and that we must turn right 120 degrees before drawing the next curve.
That’s what we’ll do.
Tada!
Conclusion
I believe that the Von Koch example is a beautiful of recursion and induction.
If you still cannot understand it after reading this post, hit me up!
Thanks Houzair Koussa for the helpful suggestions!


